Adobe Creative Suite
Unlocking the Power of Adobe Illustrator's Brushes
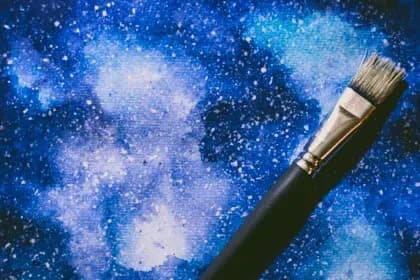
One of Illustrator's most versatile features is its impressive brush system. When utilised fully, brushes can transform your vector drawings into natural, artistic illustrations filled with painterly textures, styled imperfections and lively, hand-crafted style. In this article, we'll explore the brush options in Illustrator and techniques for customising them. We'll also share tips for using brushes to breathe organic life into your vector artwork.
Understanding Illustrator's Brush Types
Illustrator offers several categories of vector brushes, each with unique capabilities:
- Calligraphic Brushes - Mimic the effect of calligraphy pens, with adjustable thickness responding to stroke direction. Great for emulating hand lettering.
- Scatter Brushes - Disperse objects, symbols or art along the path. Perfect for natural media like spatter or grass.
- Pattern Brushes - Repeat a design motif along the path. Ideal for borders, frames or filling shapes.
- Bristle Brushes - For painterly, textured strokes similar to a real brush and canvas.
- Art Brushes - Stroke the path with vector artwork that reshapes to fit. Allows intricate decorative strokes.
Customising and Saving Brushes
What sets Illustrator's brushes apart is the ability to extensively customise them via the Brushes panel. For example, you can define parameters such as:
- Thickness profile along the stroke
- Bristle density and length
- Spacing/scatter amount
- Artwork scale and rotation
- Colour variation
- Texture and graininess
- Dynamic resizing based on stroke speed
Tips for Organic, Artistic Results
Applying brushes effectively takes practice. Here are some tips for lively, artistic results:
- Use irregular, hand-drawn paths rather than perfect shapes. This enhances the organic look.
- Vary your stroke width and speed for natural inconsistency.
- Overlap multiple strokes differing in size, texture and colour.
- Combine brush strokes with other effects like blur, warp, roughen and scatter.
- Add speckles and smears with the Paintbrush tool using a tablet for realism.
- Try blending modes like Darken and Multiply to better integrate strokes.
In Summary
Learning to leverage Illustrator's flexible brushes will allow you to efficiently create vectors with an artistic edge and personal flair. Customise brushes to suit your projects rather than relying on presets. And remember to experiment freely and allow some controlled imperfection. Mastering Illustrator's brushes will give your work an effortless, hand-crafted look and feel that sets it apart.
Relevant sources
- How to work with brushes in Illustrator (opens in a new tab)
Official Adobe article
- Brush up on Adobe Illustrator brushes (opens in a new tab)
Article from Linearity
- How to Make Adobe Illustrator Brushes (opens in a new tab)
Comprehensive article on how to create Brushes
- Illustrator brushes (opens in a new tab)
Free and paid-for brushes from Envato Elements
- Learn How to Create Digital Brushes in Adobe Illustrator (opens in a new tab)
How to create and edit your own brushes
- 25 Adobe Illustrator Brush Sets You Can Download For Free (opens in a new tab)
Free Illustrator brushes
- Learn the Basics of the Brush Tool in Adobe Illustrator (opens in a new tab)
Great article from Vecteezy
Want to go deeper?
Courses on this topic.
Adobe
Photoshop Introduction
Learn to edit photographs, build graphics and work with layers, masks and text in Adobe Photoshop. Ideal for beginners.

Adobe
Acrobat Intermediate
Build on Acrobat basics: create interactive forms, apply security settings, ensure accessibility compliance and automate PDF production tasks.

Adobe
Acrobat Introduction
Learn to create, edit and manage professional PDFs with Adobe Acrobat. Build essential document skills in one day.